Showing posts with label crafting. Show all posts

Wednesday, July 10, 2013

A Fun and Simple Do-It-Yourself Project from NativeCast

If you enjoy DIY projects, especially garden related, you're going to love NativeCast’s DIY Cast Your Own Kit. This DIY kit is a simple introduction to making your own container garden and is the perfect rainy day project for kids and adults.
This DIY project is quick and easy from start to finish. So if you don’t have the time or patience for most projects, this is the ideal one for you.

Each kit is comprised of NativeCast’s custom eco-concrete mix, a shaped mold box, organic potting mix and seeds. It includes step-by-step instructions on how to make your own container. If you’re a visual learner, NativeCast also has a great instructional video that can help you create a masterpiece of your own.

The Cast Your Own line has more shapes and sizes to choose from, like circles, squares, rectangles and even stars and hexagons.

How to build your own eco-concrete garden:

  1. Wet the mold box
  2.  Place the mix in a disposable container and add 2 ounces of water to the mix
  3. Stir in water
  4. Apply wet concrete to the interior surfaces of the mold box
  5. Let concrete dry for 24 hours and then carefully tear or cut away mold box
  6. Insert organic starter soil and plant seeds
  7. Add water to soil, keep damp until seeds sprout

What do you think? Would you make this DIY garden planter?

NativeCast is known for unique and modern garden planters that are designed and handcast by Ricky Giacco in his Chadds Ford, Pennsylvania studio. Giacco works with recycled concrete and other materials native to the Mid-Atlantic, like shells, sand and pine needles. His planters are durable, surprisingly lightweight, and easy on the planet.

If DIY isn’t your thing, check out NativeCast's wide variety of eco-planters that modernize any living space.  

~Leah
Garden Media Group

Tuesday, July 31, 2012

DIY Pots

6.6.11-9
Image by Ashley Ann
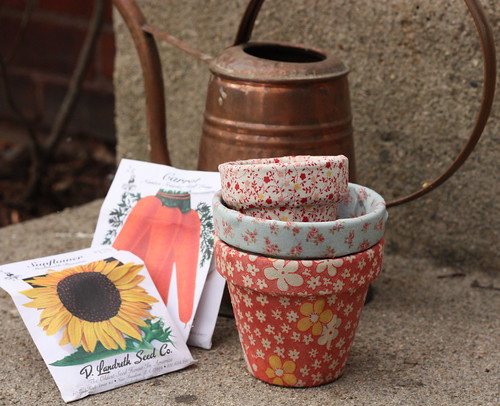
This is one of the coolest gardening crafts I've seen in a long time!  Kudos to Christine Chitnis and Ashley Ann for their creativity and ideas! And as always, thank you Leaf Magazine for finding them!

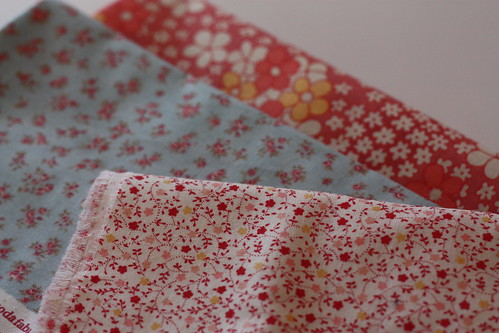
Fabric for pots
Image by Christine Chitnis
The total cost of this project was about $3 a pot. 

Materials:
Terracotta pots
Mod Podge
Brush
Fabric 

Directions:
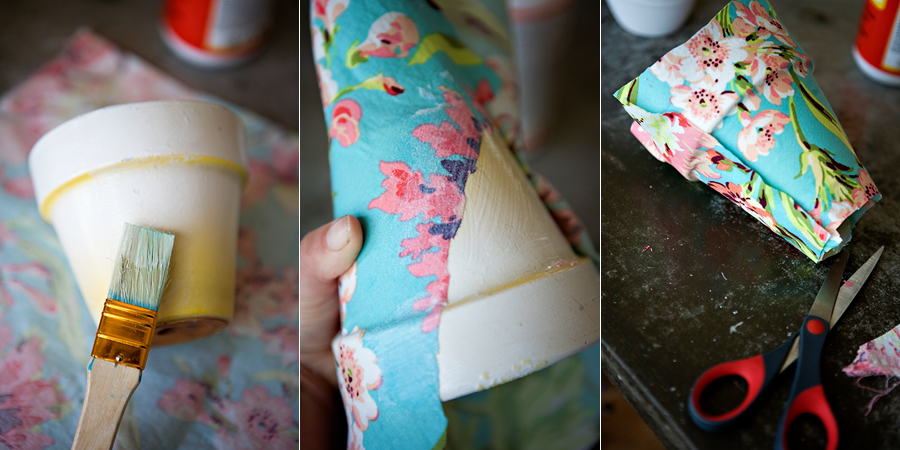
  1. Start by cutting a length of fabric that will wrap once around your pot. Leave extra room for folding it over on the top and bottom. 
  2. Cut slits in the fabric around the top, to avoid puckering as you make your way around. 
  3. Begin by coating a small section of the pot with Mod Podge. 
  4. Stick the beginning of your fabric length to the pot and once it is in place
  5. Coat the fabric with Mod Podge. 
  6. Continue doing this all the way around, without worrying about the top or bottom of the pot. 
  7. When the outside of the pot is finished, trim your fabric so that less than an inch hangs over the top and bottom. 
  8. Begin at the top, folding the fabric into the pot in pleats so that it lays nice and flat around the rim. 
  9. Coat in Mod Podge. 
  10. Do the same for the bottom, folding the fabric in pleats so that the bottom edge of the pot remains smooth. 
  11. Coat any loose flaps of fabric with Mod Podge. 
  12. Let your pot dry.
Pretty Pots